We’ve all been there – the frustrating moment when we discover that our roller chain has become a tangled mess. Whether it’s on our bike or a piece of machinery, untangling a roller chain can seem like an impossible task. But fear not! In this blog post, we will guide you through a simple step-by-step process to untangle a roller chain and get it back in working order.
Understanding the Roller Chain:
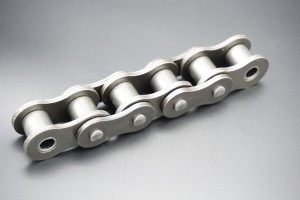
Before we delve into the untangling process, it’s important to have a basic understanding of the roller chain. A roller chain consists of a series of interconnected links that form a loop. These links have teeth, known as sprockets, which allow them to engage with the gears or sprockets of the machinery.
Step 1: Assess the Tangle:
The first step in untangling a roller chain is to assess the severity of the tangle. Is it a minor knot or a complete entanglement? This will determine the level of effort required to untangle it. If it’s a minor knot, continue to step 2. However, if it’s a complete entanglement, you may need to remove the chain from the machinery for better access.
Step 2: Identify the Knot:
Once you have identified the knot, locate the twisted part of the chain. Extend the chain out fully, if possible, to get a better view of the tangle. By understanding the knot’s structure, you can determine the best approach for untangling it.
Step 3: Use a Lubricant:
Before attempting to untangle the chain, apply a lubricant to the tangled area. This will help loosen up any tight spots and make the untangling process smoother. Use a recommended chain lubricant and allow it to penetrate the knot for a few minutes.
Step 4: Gently Manipulate the Chain:
Now it’s time to start untangling. Using your fingers or a small tool like a screwdriver, gently manipulate the chain at the twisted area. Start by loosening any obvious twists or loops. Patience is key here, as forcing the chain may cause further damage.
Step 5: Gradually Work Through the Knot:
Continue working through the tangled chain, untangling each loop and twist one by one. It may be helpful to rotate the gears or sprockets while untangling, as this can release tension and aid the process. Take breaks if necessary, but always remain focused on the untangling task.
Step 6: Reapply Lubricant:
If the chain becomes stubborn or difficult to untangle, apply more lubricant. Repeat step 3 to ensure the chain remains flexible and easy to work with. The lubricant will act as a lubricating agent, making the untangling process smoother.
Step 7: Test and Adjust:
Once you have untangled the roller chain, give it a test run. Rotate the gears or sprockets to confirm that the chain moves freely without any hiccups. If you notice any issues during testing, revisit the untangled sections and make necessary adjustments.
Untangling a roller chain may seem like a daunting task, but by following these easy steps, you can quickly restore the chain’s functionality. Remember, patience and care are essential when working with mechanical components. With a little effort, you’ll be back on track with a perfectly untangled roller chain in no time!
Post time: Aug-01-2023

