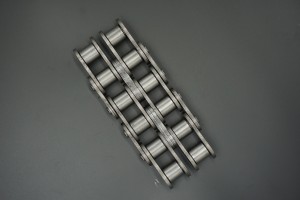
Imagine a bicycle without a chain or a conveyor belt without a roller chain. It is hard to imagine any mechanical system functioning properly without the critical role of roller chains. Roller chains are key components for the efficient transmission of power in a wide variety of machines and equipment. However, like all mechanical systems, roller chains require regular maintenance, including occasional replacement or repair. One of the common tasks is learning how to fit master links on roller chains. In this blog, we’ll guide you step-by-step through mastering this important skill.
Step 1: Gather the required tools
Before starting this process, make sure you have the following tools available:
1. A suitable pair of needle nose pliers
2. A master link dedicated to your roller chain
3. Torque wrench (optional but highly recommended)
4. Properly sized socket wrench
5. Goggles and gloves
Step 2: Know the main link
The master link is a specialized component that allows for easy installation and removal of the roller chain. It consists of two outer plates, two inner plates, a clip and two pins. To ensure a successful installation, familiarize yourself with the linked components and their respective locations.
Step 3: Locate the Break in the Roller Chain
First, identify the portion of the roller chain where the master link will be installed. You can do this by searching for breaks in the connector or chain. The main link should be installed closest to the breakpoint.
Step 4: Remove the Roller Chain Cover
Use a suitable tool to remove the cover protecting the roller chain. This will give you easier access to the chain and make the installation process smoother.
Step 5: Prepare the Chain
Next, clean the chain thoroughly with a degreaser and a brush. This will ensure a smooth and safe installation of the main link. Clean the inner and outer edges of the rollers and the pin and plate surfaces.
Step 6: Attach the main link
Now, slide the outer plates of the master links into the roller chain, aligning them with the adjacent links. Make sure the link’s pins line up properly with the chain’s pin holes. Push the link until it is fully engaged. You may need to tap it lightly with a rubber mallet to ensure proper placement.
Step 7: Install the Clip
Once the master link is securely positioned, install the retaining clip. Take one of the open ends of the clip and place it over one of the pins, passing it through the chain’s adjacent pin hole. For a secure fit, make sure the clip is fully engaged with both pins and is flush with the chain’s outer plate.
Step 8: Verify Installation
Double check the master link fit by pulling the chain gently from both sides of the master link. It should remain intact with no broken or misplaced boards. Remember, safety is paramount, so always wear gloves and goggles during this step.
Step 9: Reassemble and Test
After confirming that the master links are installed, reassemble the roller chain cover and any other associated components. Once everything is securely in place, start the machine and perform a quick operating test to ensure the chain moves smoothly.
Learning how to install a master link on a roller chain is an essential skill for any maintenance hobbyist or technician. By following this step-by-step guide, you will be able to install the master links smoothly and keep your roller chain system running safely and efficiently. Remember to always prioritize safety and maintenance procedures to prolong the life of your roller chain.

Post time: Jul-27-2023
